
Welcome to our comprehensive interlocking repair guide! Whether you’re a seasoned DIY enthusiast or a newbie, we’re here to provide you with essential tips and tools for successful interlocking paver repair techniques. Our interlocking repair guide will walk you through each step of the process, from understanding interlocking repair basics to managing your budget.
At times, you’ll find it is much more affordable to repair interlocking surfaces yourself than to call for professional help. That’s where our easy-to-follow interlocking repair guide comes in. We’ll outline the essential tools you need and provide a step-by-step guide to help you complete your DIY interlocking repair project. So, whether you’re fixing a few cracks or want to replace an entire section of interlocking pavers, we’ve got you covered with our comprehensive interlocking repair guide.
Before diving into the repair process, let’s discuss how our interlocking repair guide will help you. By following our interlocking repair guide, you’ll gain a better understanding of how to repair interlocking pavers and learn about our tested interlocking repair techniques. Additionally, we’ll provide tips for keeping your interlocking pavers in good condition for years to come through proper interlocking paver maintenance.
So, let’s get started with our interlocking repair guide. Whether you’re looking to repair interlocking pavers on your patio or driveway, we have the tools and knowledge to help you get the job done right.
Understanding Interlocking Repair
Before we dive into the interlocking repair process, it’s essential to have a good understanding of how to repair interlocking pavers. Whether you are a DIY enthusiast or an experienced contractor, these interlocking repair tips and materials will help you get the job done right.
How to Repair Interlocking Pavers
The first step in interlocking repair is identifying the problem areas that need repair. This can include cracked or broken pavers, uneven surfaces, or gaps between pavers. Once the problem areas have been identified, follow these steps for proper repair:
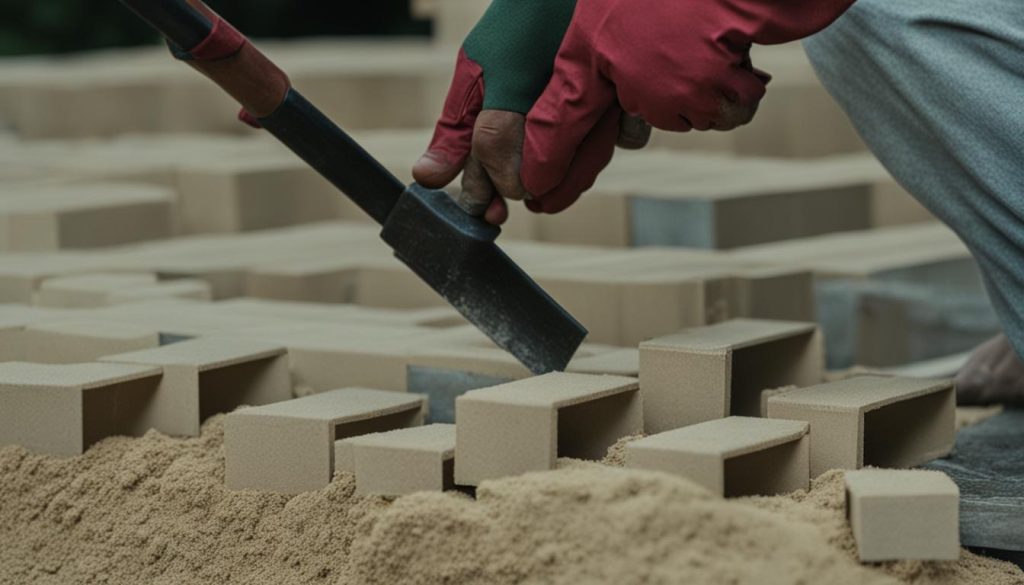
- Remove the damaged pavers using a chisel and hammer.
- Make sure the area is clean and level before installing the new pavers.
- Install the new pavers and secure them into place using sand and a rubber mallet.
- Seal the pavers to prevent future damage.
Proper interlocking repair can be time-consuming, but the results are worth it. Now that you know how to repair interlocking pavers, let’s take a look at some helpful interlocking repair tips and materials that will make your repair projects more manageable.
Interlocking Repair Tips
Here are some essential tips to keep in mind when repairing interlocking pavers:
- Before starting any repair projects, make sure you have all the necessary tools and materials on hand.
- Take your time and be patient to ensure a quality repair job.
- Fill any gaps between pavers with polymeric sand to prevent weed growth.
- Regular maintenance is key to prolonging the lifespan of your interlocking surfaces and avoiding future repair costs.
Interlocking Repair Materials
Here are some common interlocking repair materials you will need for your DIY repair projects:
| Material | Description |
|---|---|
| Polymeric sand | Used to fill gaps between pavers |
| Chisel and Hammer | Used to remove damaged pavers |
| Rubber Mallet | Used to secure new pavers into place |
| Sealer | Used to protect pavers from future damage |
With the right materials and a bit of know-how, interlocking repair can be a manageable DIY project. However, some repair jobs may require the help of a professional. In the next section, we will provide a step-by-step interlocking repair guide and discuss the cost associated with interlocking repairs.
Step-by-Step Interlocking Repair Guide
Repairing interlocking pavers yourself can save you money and give you a sense of satisfaction. However, it’s important to proceed carefully and follow the correct steps. Here’s our step-by-step interlocking repair guide to help make the process as smooth as possible.
- Assess the damage: Start by assessing the extent of the damage. This will help you determine whether the repair is a DIY job or whether you need to call in professional help. Small cracks and chips can usually be repaired at home using basic tools.
- Clean the area: Before starting the repair, ensure that the area is clean and free of debris. Use a pressure washer or hose to remove any dirt or debris, and let the area dry completely before proceeding.
- Remove damaged pavers: Use a chisel and hammer to carefully remove the damaged pavers. Be careful not to damage the surrounding pavers. If you’re having trouble removing the pavers, use a saw with a diamond blade to cut them out.
- Prepare the base: Once the damaged pavers have been removed, prepare the base. Use a shovel to remove any loose soil, and add a layer of crushed stone to the area. Compact the stone using a plate compactor or hand tamper until it’s level with the surrounding area.
- Install new pavers: Carefully install the new pavers in the prepared area. Ensure that they are level and flush with the surrounding pavers. If necessary, use a rubber mallet to gently tap the pavers into place.
- Fill the joints: Once all the new pavers are in place, fill the joints with sand or polymeric sand. Use a broom to sweep the sand into the joints and then use a plate compactor to compact the pavers and sand together.
- Clean up: Finally, clean up the area and remove any excess sand or debris. Rinse the area with water to settle the sand and compact the pavers one final time.
It’s important to note that the cost of interlocking repair can vary depending on the extent of the damage and whether you decide to hire professional help. If you’re on a tight budget, DIY interlocking repair can be a cost-effective solution.

However, if you’re not comfortable with the repair process or if the damage is extensive, it’s best to call in a professional. They have the expertise and tools to get the job done right.
Essential Tools for Interlocking Repair
When it comes to DIY interlocking repair, having the right tools for the job is essential. Here are the essential tools you will need for successful interlocking repair.
Interlocking Repair Materials
The type of interlocking repair materials you need will depend on the type of repair you are doing. Here are some common interlocking repair materials:
| Material | Description |
|---|---|
| Interlocking sand | Used to fill in gaps between interlocking pavers |
| Jointing sand | Used to stabilize interlocking pavers and prevent weed growth |
| Interlocking pavers | Used to replace damaged or worn-out pavers |
| Concrete adhesive | Used to bond interlocking pavers together and fix cracks |
Make sure to purchase high-quality interlocking repair materials to ensure a successful repair.
Tools for Interlocking Repair
Here are the essential tools you will need for interlocking repair:
- Gloves: to protect your hands while handling materials and tools
- Chisel: to remove any damaged or broken pavers
- Masonry saw: to cut interlocking pavers to fit specific areas
- Level: to ensure the pavers are level and even
- Tamper: to compact the sand and ensure a stable foundation
- Broom: to sweep sand into the joints of the interlocking pavers
Having these tools on hand will make your interlocking repair projects easier and more efficient.
DIY Interlocking Maintenance Tips
Regular maintenance is essential to keep your interlocking pavers looking and functioning their best. By taking a few simple steps, you can prolong the lifespan of your interlocking pavers and avoid costly repairs down the road. Here are our top DIY interlocking maintenance tips:
- Clean regularly: Use a broom or leaf blower to remove debris and leaves from your interlocking surface. For a deeper clean, use a pressure washer or a mixture of warm water and mild soap. Avoid using harsh chemicals or cleaners that can damage your interlocking pavers.
- Inspect for damage: Periodically inspect your interlocking pavers for any signs of damage, such as cracks or shifting. Catching these issues early can prevent further damage and avoid the need for costly repairs.
- Resand as needed: Over time, the sand between your interlocking pavers can become displaced, leading to shifting and instability. Resand your interlocking pavers as needed to ensure a stable and level surface.
- Apply sealant: Applying a sealant to your interlocking pavers can help protect against stains, fading, and damage from the elements. Be sure to follow the manufacturer’s instructions carefully for best results.
- Address spills and stains promptly: If you spill oil, grease, or other substances on your interlocking surface, clean it up promptly to prevent staining and damage to your pavers.
By following these DIY interlocking maintenance tips, you can keep your interlocking pavers looking like new for years to come.
Hiring Professional Interlock Repair Services
If you’re considering hiring professional interlock repair services, there are a few factors to keep in mind. While DIY interlocking repair can be a cost-effective solution, it’s not always the best option. Professional contractors have the experience, expertise, and tools to complete your repair project efficiently and effectively.
One of the main advantages of hiring professionals is that they have specialized knowledge of interlocking repair materials. They can recommend the best type of material for your project, which can save you money in the long run by preventing future repairs. They can also guarantee the quality of their work and provide a warranty, giving you peace of mind.
Another important consideration is the cost of hiring professional services. While it may seem expensive at first, it’s important to compare the cost of hiring a professional with the cost of doing the job yourself. A professional contractor will have access to industry-specific tools and equipment, which can be costly to purchase or rent. They also have the expertise to complete the job quickly and efficiently, which can save you time and money.
When choosing a professional contractor, it’s important to do your research. Look for contractors with a good reputation and positive customer reviews. Check their licensing and insurance credentials to ensure they’re a legitimate business. And don’t forget to ask for a detailed quote before hiring them to avoid any surprises.
At the end of the day, the decision to hire professional interlock repair services comes down to your personal preferences and budget. If you’re unsure of whether to tackle the job yourself or hire a professional, consider weighing the pros and cons of each option and choose the one that makes the most sense for you.
Conclusion and Additional Resources
Repairing interlocking pavers can be a daunting task, but with the right tools and knowledge, it can be done successfully. We hope our DIY interlocking repair guide has provided you with valuable tips and information to help you complete your repair projects.
Don’t forget to use our interlocking repair checklist to ensure you don’t miss any important steps in the repair process. This checklist will help keep you organized and on track.
Tips for Finding Reliable Contractors
While DIY interlocking repair can save you money, there are times when hiring a professional is the best option. Here are some tips for finding reliable contractors:
- Ask for referrals from friends, family, or neighbours who have had similar repair work done.
- Research online reviews and check the contractor’s rating with the Better Business Bureau.
- Ask for references and follow up with them to ensure they were satisfied with the work.
- Get multiple quotes to compare pricing and services offered.
- Make sure the contractor is licensed and insured.
By following these tips, you can ensure you find a reputable contractor who will do quality work on your interlocking repair project.
Thank you for reading our DIY interlocking repair guide. For more information and resources, be sure to check out our website and follow us on social media.
FAQ
What are the essential tips and tools for DIY interlocking repair?
Our DIY interlocking repair guide provides essential tips and tools for repairing interlocking pavers. We cover step-by-step instructions and recommend the necessary tools to ensure a successful repair.
How can I understand interlocking repair better?
Understanding interlocking repair is crucial before starting the process. Our guide discusses how to repair interlocking pavers, provides helpful tips, and outlines the materials you will need for the job.
Do you have a step-by-step interlocking repair guide?
Yes, we provide a detailed step-by-step interlocking repair guide. Follow our instructions carefully to ensure a successful repair. We also discuss the associated cost of interlocking repairs and provide budgeting tips.
What are the essential tools for interlocking repair?
Having the right tools is essential for DIY interlocking repair. Our guide outlines the essential tools you will need, including the types of interlocking repair materials required to make your repair projects easier and more efficient.
How can I maintain my interlocking surfaces?
Regular maintenance is crucial to keep your interlocking pavers in good condition. Our DIY interlocking maintenance tips will help prolong the lifespan of your surfaces and prevent future repairs.
Should I hire professional interlock repair services?
While DIY interlocking repair can be cost-effective, there are instances when hiring professionals is the best option. We discuss the benefits of hiring professionals and provide tips for finding reliable contractors.
What is included in the conclusion and additional resources?
Our DIY interlocking repair guide concludes with additional resources, including an interlocking repair checklist. These resources will help you throughout your repair projects and ensure you don’t miss any important steps.