
Welcome to our comprehensive interlock repair guide! At Interlock Repair, we understand how frustrating it can be to deal with interlock issues. That’s why we’ve created this guide to assist Canadian homeowners with all their interlock repair needs. Whether you’re experiencing common problems or need to perform maintenance on your interlock system, we’ve got you covered.
Our guide is designed to be a one-stop-shop for all interlock-related issues. We’ll walk you through the repair process step-by-step and provide helpful tips and tricks to ensure a successful repair. With our guide, you’ll be able to troubleshoot and repair interlock problems quickly and easily.
So, let’s get started with our interlock repair guide! We’ll cover everything from understanding interlock systems to identifying common problems and providing detailed repair techniques. Whether you’re a DIY enthusiast or prefer professional assistance, our guide is here to help.
Understanding Interlock Systems
Before we dive into the interlock repair process, it’s important to understand how interlock systems work. At its core, an interlock system is a pavement system made up of concrete pavers or stones that are held in place by interlocking joints. These joints allow the pavement to flex and move without cracking or buckling under pressure.
The interlock system is made up of several components, including:
- The base layer, which provides a stable foundation for the pavers or stones
- The bedding layer, which is a thin layer of sand or gravel that sits on top of the base layer
- The pavers or stones themselves
- The jointing sand, which fills the spaces between the pavers or stones and locks them in place
Interlock systems can experience a variety of issues, including:
- Pavers or stones becoming dislodged
- Cracks in the pavement
- Joints becoming clogged with debris
- Uneven or sloping pavement
Identifying the issue with your interlock system is the first step in finding a solution. In the next section, we’ll discuss the tools you’ll need to perform interlock repairs.
Understanding Interlock Systems: Takeaways
- An interlock system is made up of concrete pavers or stones held in place by interlocking joints
- The system includes a base layer, bedding layer, pavers or stones, and jointing sand
- Common issues include dislodged pavers or stones, cracks, clogged joints, and uneven pavement
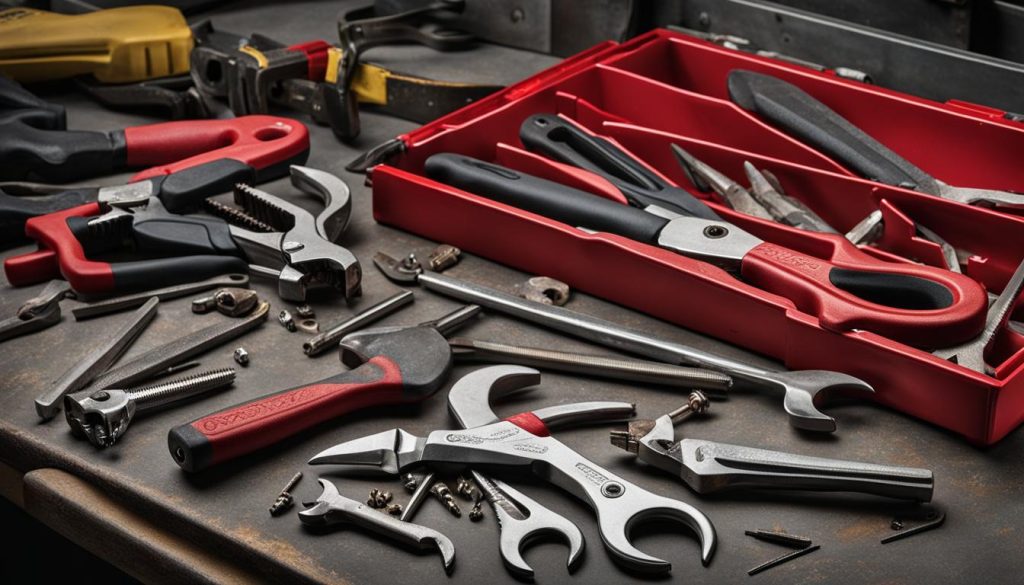
Tools for Interlock Repair
Having the right tools is essential for any DIY interlock repair project. Here are some of the tools and equipment you’ll need:
- Rubber Mallet: Used to adjust pavers that have shifted or settled unevenly.
- Chisel: Used to remove damaged pavers or stones.
- Level Tool: Used to ensure the pavers are level and even.
- Plate Compactor: Used to compact the base material and ensure a level and stable base for the pavers.
- Sand: Used to refill the joints between pavers and prevent shifting.
- Sealer: Used to protect the interlock surface against weather, stains, and wear and tear.
These tools can be found at most hardware or home improvement stores. If you’re unsure which tools are necessary for your specific interlock repair needs, consult with a professional or contact us at Interlock Repair for guidance.
Common Interlock Problems
Interlock systems are designed to be durable but can experience problems over time. In this section, we’ll cover some of the most common interlock issues that homeowners face.
1. Sinking Pavers
One common interlock problem is sinking pavers, which can create an uneven surface and pose a tripping hazard. This problem is often caused by poor installation or water infiltration beneath the surface.
To fix this issue, you’ll need to remove the affected pavers and add a base of crushed stone to provide stability. Carefully level the area before replacing the pavers, and make sure to use a compactor to ensure proper settling.
2. Weed Growth
Weeds can quickly take over interlock surfaces, making them unsightly and difficult to maintain. This problem is often caused by inadequate base preparation or poor joint sand application.
To prevent weed growth, regularly apply a polymeric joint sand to the area, which hardens and prevents weed growth. You can also apply herbicides to kill any existing weeds, but be sure to follow manufacturer instructions carefully.
3. Stains and Discoloration
Interlock surfaces can become stained or discolored over time due to exposure to weather elements, oil spills, or other factors.
To restore the color and appearance of your interlock, you can use a pressure washer or specialized cleaning solution. Avoid using harsh chemicals that may damage the surface, and always test cleaning solutions in a small, inconspicuous area before applying to the entire surface.
4. Ants and Insects
Ants and other insects can burrow into the sand joints of interlock surfaces, causing instability and damage over time.
To prevent ant and insect infestations, you can apply insecticides around the perimeter of your interlock area. You can also regularly sweep and clean the surface to remove any debris that may attract insects.
5. Cracked or Loose Stones
Cracking or loose stones can occur due to settling of the base, improper installation, or heavy traffic.
To fix this issue, you’ll need to remove the affected stones and re-level the base. Replace the stones carefully and ensure they are level and secure.
By being aware of these common interlock problems, you’ll be better equipped to address any issues that arise with your interlock system.
Troubleshooting Interlock Issues
If you’ve noticed issues with your interlock system, troubleshooting is the first step in the repair process. Follow these step-by-step instructions to identify the problem and determine the appropriate repair technique.
Step 1: Determine the Issue
The first step in troubleshooting your interlock system is to identify the problem. Common issues include uneven pavers, sinking stones, and loose bricks. Inspect your interlock system carefully to determine the root of the problem.
Step 2: Assess the Severity
Once you’ve identified the issue, assess the severity. Is the problem minor, or does it require immediate attention? This will help determine the appropriate repair technique and prevent further damage.
Step 3: Research Repair Techniques
Once you’ve identified the issue and assessed the severity, research appropriate repair techniques. Some minor issues, such as resetting pavers, can be repaired with basic tools and DIY techniques. For more complex issues, it may be necessary to consult a professional interlock repair service.
Step 4: Determine the Cause
Identifying the cause of the problem is essential to prevent future issues. For example, sinking stones may be caused by soil erosion or inadequate base preparation. By addressing the root cause, you can prevent the problem from recurring.
Step 5: Implement Repair Technique
Once you’ve identified the issue, assessed the severity, researched repair techniques, and determined the cause, it’s time to implement the repair technique. Follow our step-by-step guide in Section 6 to repair common interlock problems.
Remember, if you’re unsure of the issue or how to repair it, consult a professional interlock repair service. Attempting to repair complex issues without appropriate expertise can worsen the problem and lead to additional expenses.
In the next section, we’ll provide a step-by-step guide on how to repair common interlock problems, including resetting pavers and fixing loose stones.
Repairing Interlock: Step-by-Step Guide
Now that you’ve familiarized yourself with your interlock system and have the necessary tools, it’s time to start repairing your interlock. Follow these step-by-step instructions to address common interlock problems.
Repairing Loose Stones
If you notice loose stones in your interlock, it’s important to address the issue before it worsens. Here’s how to repair loose stones:
- Remove the loose stone from the interlock.
- Clear the area of any debris to ensure a clean surface for repair.
- Replace the stone with a new one of the same size and color.
- Use a rubber mallet to tap the new stone into place until it is level with the surrounding stones.
- Repeat as necessary for any additional loose stones.
If you don’t have a replacement stone on hand, don’t worry! Visit your local hardware store or stone supplier to purchase a replacement.
Resetting Pavers
Pavers in your interlock may become uneven over time due to settling or erosion. Here’s how to reset pavers:
- Remove any sand or debris from between the pavers using a broom or blower.
- Use a pry bar to lift the paver you want to reset.
- Adjust the base material and make sure it is level.
- Replace the paver and use a rubber mallet to tap it into place.
- Fill the gaps between the pavers with sand and sweep away any excess.
Repairing Chips and Cracks
Accidents happen, and chips or cracks in your interlock can occur. Here’s how to repair them:
- Clean the area around the chip or crack.
- Apply a concrete bonding adhesive to the damaged area.
- Mix concrete patching material according to the manufacturer’s instructions.
- Apply the patching material to the damaged area and smooth with a trowel.
- Let the patching material dry completely.
- Seal the repaired area with a concrete sealer.
By following these simple steps, you can easily repair your interlock and keep it looking like new for years to come. Don’t hesitate to contact us at Interlock Repair for professional assistance or if you have any additional questions on interlock maintenance.
Maintenance Tips for a Long-lasting Interlock
Regular maintenance is key to ensuring your interlock system remains in top condition. Here are some tips to help you maintain your interlock:
1. Clean Your Interlock Regularly
Cleaning your interlock regularly will help prevent the buildup of dirt, debris, and weeds. Use a broom or leaf blower to remove loose debris and rinse the surface with water. For tougher stains, use a pressure washer on the lowest setting.
2. Reseal Your Interlock Every Two Years
Resealing your interlock every two years will help protect it from weathering, fading, and staining. Make sure to clean the interlock thoroughly before applying the sealant.
3. Address Stains and Spills Immediately
If you notice any stains or spills on your interlock, address them immediately. Use a cleaner designed for interlock systems and a soft-bristled brush to scrub away the stain.
4. Fix Any Cracks or Damage Promptly
If you notice any cracks or damage to your interlock, it’s important to address them promptly. Leaving them unattended could lead to further damage and more costly repairs down the road. Consult with a professional if you’re uncertain about how to proceed.
5. Consider Professional Maintenance Services
Professional maintenance services can help you keep your interlock system in optimal condition. Consider hiring a professional to perform deep cleaning, resealing, and repairs on your interlock system.
By following these maintenance tips, you can extend the lifespan of your interlock system and avoid costly repairs. For more interlock repair tips and advice, stay tuned to our interlock repair guide.
Contact Interlock Repair for Professional Assistance
We hope that our interlock repair guide has been helpful in addressing your interlock issues. However, if you encounter complex interlock problems or prefer professional assistance, don’t hesitate to contact us at Interlock Repair.
Our Services
At Interlock Repair, we offer a wide range of services to meet your interlock repair needs. Our team of experts is highly trained and experienced in addressing any interlock problem you may face.
We specialize in interlock repair and offer services such as interlock maintenance, interlock restoration, interlock sealing, and more.
How to Contact Us
To learn more about our services or to schedule an appointment with us, you can reach us at (647) 812-8542 or visit our website at interlockrepair.ca. We are always ready to provide the necessary support and expertise to resolve any interlock problems you may have.
Don’t let interlock problems stress you out. Contact Interlock Repair for professional assistance today.
FAQ
How do I repair my interlock?
To repair your interlock, follow our step-by-step guide in Section 6. We provide detailed instructions on how to fix common interlock problems, such as resetting pavers and fixing loose stones.
Do I need any special tools for interlock repair?
Yes, having the right tools is important for a successful interlock repair. In Section 3, we provide a list of essential tools and equipment needed for interlock repair. This will ensure you have everything you need to get the job done.
What are some common interlock problems?
Interlock systems can experience various issues. In Section 4, we outline some of the most common problems homeowners face with their interlock systems. This includes issues like sinking pavers, weed growth, and uneven surfaces.
How can I troubleshoot interlock issues?
Troubleshooting is an important step in the interlock repair process. In Section 5, we provide a step-by-step troubleshooting process to help you identify the root cause of the problem. We also offer specific repair techniques for each issue.
What maintenance tips can help prolong the lifespan of my interlock?
Proper maintenance is essential for a long-lasting interlock system. In Section 7, we share valuable tips on how to maintain your interlock to ensure it stays in optimal condition. These tips will help prevent future issues and extend the lifespan of your interlock.
Can I get professional assistance for interlock repair?
Absolutely! If you encounter complex interlock issues or prefer professional assistance, contact us at Interlock Repair. Our team of experts is ready to provide the necessary support and expertise. You can reach us at (647) 812-8542 or visit our website https://www.interlockrepair.ca/ for more information on our services.